Pages

Tuesday, August 31, 2010

When Good Cards Go Bad


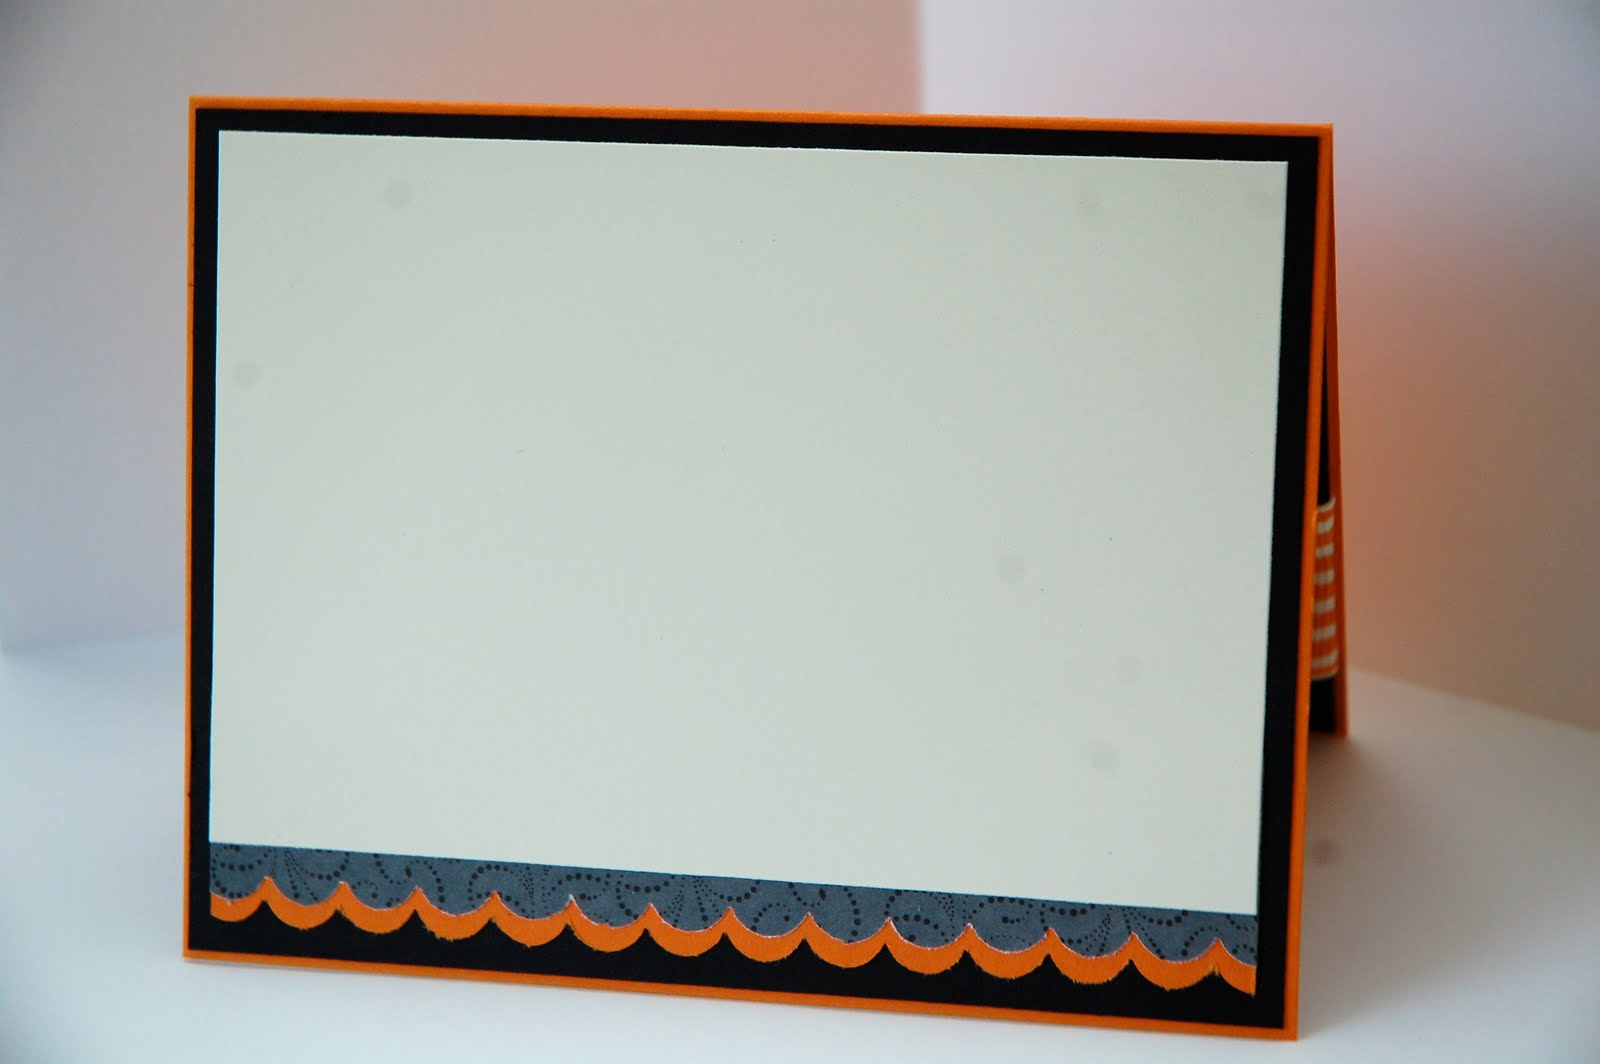
Well, it had potential and then it didn't. I wouldn't be posting this except I promised Lissie I would post my ugly card. So, here it is, in all it's awful glory. There's not much to say, really. I tried distressing, it didn't work. Oh, well. Not my style, I guess...

This card uses:
Stamp Sets: "Greeting Card Kids", "Teeny Tiny Wishes"
Paper: watercolor, Blushing Bride, Newsprint DSP
Inks: Black Staz-On, Soft Suede, Marina Mist, Daffodil Delight, Real Red, Night of Navy, Chocolate Chip, More Mustard, Sahara Sand
Accessories: Log Cabin Smooch Spritz

We'll give it an A for effort, right? Right?!?

--Rach

Monday, August 30, 2010

Day Brightener


There are times when friends go through difficult times, and it is always nice to have a card on hand to send in hopes of brightening their days. One of my friends recently found out that her father has lung cancer, so I made this card to send to her. Here's what I used:
  • Stamp Sets--Hope Happens and Garden Silhouettes
  • Designer Series Paper--Sunny Garden
  • Ribbon--Pear Pizazz
  • Inks--Poppy parade and Pear Pizazz
--Lissie

Sunday, August 29, 2010

Simple, Yet Elegant


At least I think so. I've been dying to play with Early Espresso and Cherry Cobbler as a color combo and finally did so last night. Boy, talk about rich, deep colors!

I pulled out my "Medallion" stamp, rock-and-rolled it with Cherry Cobbler and Early Espresso, and stamped. The base looked a bit naked so I stamped it with VersaMark and "En Francais".

And, the inside. :o)

This card uses:
Stamp Sets: "Medallion", "En Francais"
Inks: Cherry Cobbler, Early Espresso
Papers: Whisper White, Early Espresso, Cherry Cobbler
Accessories: Pearls

This card makes me hungry--I'm thinking of black forest cake. :oP

--Rach

Saturday, August 28, 2010

Red and Black--Inspired By Rachael

When Rachael posted her little boxes, it reminded me how much I love the combination of black and red. It is eye catching and I've often worn the combination both in clothes and shoes. As a result, I set out to create a card using these colors. I turned to the same paper Rachael used, Rockabilly, mostly because it has shiny bits on it. Tart and Tangy is a favorite stamp set and the cherry stamp complements the paper. To make the cherries pop, I covered them with Crystal Effects.

Supplies used:
  • Stamp Set--Tart & Tangy
  • Designer Series Paper--Rockabilly
  • Ribbon--Ridinghood Red
  • Crystal Effects
  • Ink-Ridinghood Red, Garden Green, Chocolate Chip
I took half a dozen pictures of this card and gave up getting a good one. I am hopeless at photography.

--Lissie

Friday, August 27, 2010

Lissie's Birthday Card


Due to a slightly unhappy baby last night, I was unable to make a card. Oh, I got a start here and a cut there, but Ellie was having none of it. So, I thought I would post the card I made for Lissie's birthday back in June.

It's a simple little card, but it makes me very happy. :o) It could be the ROY G BIVed flowers, it could be the Daffodil Delight card base. It could be the combination of everything. Who knows. What I do know is this was a simple little card to put together and it was fun to make. :o)

This card uses:

Stamp Set: PTI's "Signature Greetings"
Ink: Pacific Point
Paper: Daffodil Delight, Whisper White, Real Red, Pumpkin Pie, Wild Wasabi, Elegant Eggplant, Rich Razzleberry
Accessories: Trio Flower Punch (retired), Crystal Effects

Like I said, simple, but fun! :o)

--Rach

Thursday, August 26, 2010

Fall Silhouette


Still in a fall mood--I can actually feel it in the air--I decided to make an end-of-summer card to send to my father. Dad and I exchange old fashioned letters every single week, and it gives him a bit of a thrill to receive a handmade card in addition to the letter. Dad is an artist so he is more appreciative than most of my efforts to use color and design.

Here's what I used to make this card:
  • Designer Series Paper--Autumn Vine
  • Stamp Set--Garden Silhouettes
  • Buttons--Really Rust
  • Ribbon Originals--Jersey (I layered the ribbons)
  • Punch--Pinking Hearts Border
  • Card Stock--Really Rust and More Mustard
  • Ink--Wild Wasabi
--Lissie

Wednesday, August 25, 2010

Strawberry Inspiration

Aren't these little guys cute? I will periodically make a couple of these little boxes of cards to have on hand to give as a little "thank you" gift. They also make excellent stocking stuffers. :o)

But, why strawberries and black and vanilla? Because of this:

This is the inspiration photo for the challenge over at the Paper Players this week. I was immediately struck with the strawberries and their juxtaposition with the blackberries. I LOVE black and red as a combination. I picked up that light vanilla color from the cheese in the bottom right corner and that was it! I instantly knew I wanted to make a couple of little boxes of cards. :o)

Each box holds four 3"x3" cards and envelopes.

I put two red and two black cards in each box. See how I used the polka-dotted paper to pick up the polka-dotty look of the blackberries? :o)

I also got to play with my "Rockabilly" paper, which I've been squirreling away for a special occasion. :o)

I used my Crop-a-Dile to punch the holes for the ribbon to pass through.

And, of course, I lined the inside of the cards as well. :o)

This project uses:
Stamp Sets: "Tart and Tangy", "Warm Words"
Inks: Wild Wasabi, Real Red
Paper: Real Red, Basic Black, Very Vanilla, "Rockabilly" DSP, and Real Red DSP from a hostess pack
Accessories: 1 1/4" circle punch, 1 3/8" circle punch, scallop circle punch, Crop-A-Dile, 1/4" red and black gingham ribbons, white gel pen, dimensionals

Now, to whom do I give the boxes...? :o)

--Rach

Tuesday, August 24, 2010

It's Time To Cast A Spell

I'm not much for Halloween these days, but I have fond memories of trick or treating when I was a child, and I know my grandchildren love it, too. So, I began to work on cards for the fall and this is the first of my Halloween cards, ones I will send to my sweeties. Using ink in the lid of my stamp pad, I watercolored the image. Here are the supplies I used:

Stamp Sets: Greeting Card Kids and Scary Skeleton
Designer Series Paper: Cast A Spell
Inks: Old Olive, Black, Rich Razzleberry, Cajun Craze, Sahara Sand, and Pumpkin Pie
Rickrack: Ribbon Originals--"Pigtails" in Pumpkin Pie
Card Stock: Old Olive and Perfect Plum


Monday, August 23, 2010

School Daze

It's that time of year again--the back-to-school sales are on and there is excitement in the air. Teachers are scurrying to get their rooms ready in between all the mandatory meetings and school division professional development requirements (trust me, there is VERY little time to get that room ready!). But, it's all worth it, for the day after Labor Day (around here, anyway--don't ask about the "King's Dominion Law"...) we are greeted with shiny, smiling faces in brand new clothes, ready to embark on a new year. I confess, I'm going to miss that.

I borrowed the spiral punch idea from Lissie and the card came together. :o) Those kiddies are just too stinkin' cute!

And, the inside. I thought that sentiment went well with the kiddos on the front. :o)

This card uses:
Stamp Sets: "Greeting Card Kids", "Teeny Tiny Wishes", "Warm Words", "Heard From the Heart", "Tart and Tangy"
Inks: Oh, dear, let's see, Soft Suede, Cajun Craze, Real Red, More Mustard, Wild Wasabi, Garden Green, Sahara Sand, Blush Blossom, Pretty in Pink, Night of Navy, Chocolate Chip (Whew!)
Paper: Real Red, Soft Suede, Very Vanilla, Watercolor, Summer Picnic DSP (which I have hoarded), Newsprint DSP
Accessories: Eyelet border punch, spiral notebook punch

Goodness I'm enjoying watercoloring!! :o)

--Rach

Sunday, August 22, 2010

Fox and Friends


As most any grandparent will tell you, having grandchildren brings a dimension to your life that you never could have imagined. I think about each one of my babies many times each day. Just thinking about one of them can put me in a grand mood that lasts for hours. If there is anything better in life than family, I have no idea what it could be. Often, when I am making cards, I think of a particular grandchild and then design a card specifically for that child. Other times, I make several cards for my grandchildren and then, later, decide who will be the recipient of each one. It is that case with this card. I knew I wanted to use Wild Wasabi--aren't we all glad that color came back--and my new stamp set Fox and Friends. As I looked through my Designer Series Papers, I was attracted to Uptown because it has circles in it and colors I like. Thus, this card was born. Here's what I used:
  • Stamp Sets--Fox and Friends and Teeny Tiny Wishes
  • Nesties--Scallop and Circle
  • Dotted Scallop Ribbon Border Punch
  • Designer Series Paper--Uptown
  • White Brads
  • Card Stock--So Saffron and Wild Wasabi
  • Inks--Wild Wasabi and Close to Cocoa
Now I have to decide which of my sweet and precious babies will receive this card.

--Lissie

Saturday, August 21, 2010

Autumn=Halloween?

As you all have probably realized, I'm dying for autumn to arrive. Halloween and pumpkins are definitely autumnal, right? Well, I have had so much fun watercoloring these sweet kiddos that I have many, many images lying around, ready to use in cards. Last night, while waiting for Brien to return from the rehearsal dinner he was attending, I got in the studio and decided to do something with them. The latest Paper Players challenge is a sketch challenge and I decided to play along, especially as I haven't been able to play along in quite a while.

Yes, I know, I didn't make a square card, nor did I use a circle (I don't have any large circle cutting devices...), but it remains fairly true to the sketch otherwise. ;o)


And, of course, the inside. I didn't have anything to stamp in here so I decided to use paper instead. :o)

This card uses:

Stamp Sets: "Greeting Card Kids", "Teeny Tiny Wishes"
Ink: Daffodil Delight, Pumpkin Pie, Tangerine Tango, Old Olive, More Mustard, Chocolate Chip, Rich Razzleberry, Basic Black, Sahara Sand, Black Staz-On
Paper: Watercolor paper, Very Vanilla, Pumpkin Pie, Basic Black, retired SU! Halloween DSP (I can't for the life of me remember the name--Sorry!)
Accessories: Dimensionals, scallop border punch, 1 1/4" Pumpkin Pie striped grosgrain ribbon, mini pearls

I'm planning on making some similar cards to send to my nieces and nephews--I just can't get enough of these "Greeting Card Kids" and the watercoloring--it's such a stress relief for me. :o)

--Rach

Thursday, August 19, 2010

Trees


I'm such a sucker for trees. I bought the entire set, Forest Friends, just to get this tree stamp. With autumn peeking around the corner, I made this card to celebrate the upcoming change of seasons. I haven't decided yet what I'm going to do with this card, so I have not added a saying to the front. When I do, I will stamp it in Chocolate Chip or Early Expresso so that it will show up well on the More Mustard portion of the Designer Series Paper. The card is 4" x 4.5" instead of the usual 4.25" x 5.5". I chose this size to give the card balance.

Here are the supplies I used:

  • Stamp Set--Forest Friends
  • Designer Series Paper--Autumn Vine
  • Card Stock--Sage Shadow
  • Inks--Sage Shadow, More Mustard, Chocolate Chip, and Really Rust
  • Brads--More Mustard
--Lissie

Wednesday, August 18, 2010

Another Long Fellow


I made this card for Lily because she has such a good sense of humor and I thought the dog would make her laugh. It also turned out to look quite a bit like Hokie colors, and the Davis clan are big Virginia Tech fans.

Here's what I used to make this card:
  • Card Stock Colors--Very Vanilla, Pumpkin Pie, and Rose Red
  • Sweet & Sour DSP
  • Buttons in Very Vanilla, Pumpkin Pie, and Rose Red
  • Rose Red Ribbon
--Lissie

Tuesday, August 17, 2010

Poppy Love


I was so taken with how well my wedding card turned out, I decided to try another one using a different embossing folder and color. Once again, I'm pleased with the clean and simple feel of the card.

This card uses:
Stamp Set: "Short and Sweet"
Papers: Poppy Parade, Whisper White
Ink: Poppy Parade (note: I still haven't purchased the stamp pads--the markers continue to work well)
Accessories: Elegant Bouquet embossing folder, Beautiful Wings Embosslits, crystal effects

This was another SUPER easy card that came together in no time, but looks lovely nonetheless.

--Rach

Monday, August 16, 2010

More Back To School

For some reason this little girl--from the set Greeting Card Kids--reminds me that schools are opening all over the country (even though she is holding a heart and not a book or backpack). When Rachael was here, she taught me how to use an Aquapainter and watercolor paper to create a softer image. We first stamped images using permanent black ink (StazOn) and then using an Aquapainter slowly added color using the ink in the lid of the stamp pad. (You squeeze the pad together with your hands so that ink is deposited in the lid.) I had a pack of Tempting Turquoise DSP and decided to use it along with Real Red card stock because I liked the Real Red Ribbon and wanted to use it. To add interest I used my Spiral Border Punch and then tilted the image a bit. Here's a complete list of supplies I used:
  • Tempting Turquoise DSP
  • Real Red and Tempting Turquoise Card Stock
  • Aquapainter
  • Real Red Ribbon
  • Tempting Turquoise Button
  • Inks: Blush Blossom, Bashful Blue, Basic Black, StazOn Black, Sahara Sand, Real Red
When I finished the card I added the saying. Isn't it a shame after all that work I didn't stamp it straight?

--Lissie

Elegant Wedding

Brien will be the best man in a wedding Saturday. Assuming I can find babysitting, I'll be attending as well (our sitters sort of fell through and now I'm scrambling). I needed a card for the happy couple and knew I wanted something understated and elegant.

Thinking "elegant", I promptly thought of my "Elegant Lines" embossing folder and from there the card simply gelled. :o) To set off the embossing, I decided to use dimensionals to give it a "lift".


My biggest problem was finding an appropriate stamp for the inside, as most of my sentiments, while having a nifty font, were too informal for this card. I came upon "Sincere Salutations" and knew it was perfect. :o)

This card uses:
Stamp Sets: "Teeny Tiny Wishes" (this is SO a "must have" set!), "Sincere Salutations"
Paper: Whisper White, Sahara Sand
Ink: Sahara Sand
Accessories: "Elegant Lines" embossing folder, pearls, dimensionals

I just LOVE how beautiful and simple this card is!

--Rach

Saturday, August 14, 2010

Pawsitively Prints


I decided to make a card to send to my grandson so got out a new set I hadn't yet used--Long Fellows. I had some new DSP, too, Pawsitively Prints, and thought it would work well for this informal card. Here are the other supplies I used:
  • Card stock--Tempting Turquoise and Poppy Parade
  • Ribbon--Poppy Parade
  • Scallop border punch
  • Ink--Tempting Turquoise and Poppy Parade
It's a shame the red layer of Pawsitively Prints doesn't show up well; the design on the paper is delicate. (It's the layer under the plaid.)

--Lissie

Friday, August 13, 2010

Loads of Love (Still Thinking About Autumn)

When Rachael came to visit, she brought my Stampin' Up order. For years I've considered the stamp set, Loads of Love, and I finally made the decision to purchase it. Today was the first day I had time to stamp; it was not possible with a house full of company. Better the company than stamping, however, so I put my card making on hold. When I began to design this card, I had to decide what load, if any, I would put in the truck bed. Once I decided to go with pumpkins, my next decision was to figure out what other colors and DSP to use. As I leafed through my DSP sets, I spied Washington Apple and knew this was the set to use because the colors are Bashful Blue, So Saffron, Pumpkin Pie, and Ridinghood Red. I also decided to try water coloring on regular white card stock and was pleasantly surprised by the results, though next time I'll probably use water color paper. After I put the card together, I decided to pierce the red paper behind the truck. I'll probably add a sentiment when I send the card, but I'm not sure yet what it will be or where I will put it, but it probably will go at the top of the red paper.

Supplies I used:
  • Ink colors--Sahara Sand, Close to Cocoa (retired), Bashful Blue, Pumpkin Pie, Old Olive, and Ridinghood Red.
  • DSP--Washington Apple
  • Card stock--Bashful Blue and Ridinghood Red
  • Ribbon--Ridinghood Red
  • Aquapainter
--Lissie

Back to School


In continuing with my "longing-for-autumn" theme, I have these sweet, adorable kiddos. I fell in love with "Greeting Card Kids" the first time I saw them, but then had to question, how in the world would I use them?? They are not my typical style and I knew I would struggle to make them work. And yet, how could I not get them? They were so stinkin' cute!


So, they arrived, I got out my watercolor paper, and I found the greatest form of stress relief! I always color when I'm stressed, and watercoloring proved to be just as useful. Only, this was more fun somehow. :o)

But, as I feared, they have been very difficult for me to make into a card. I have NO idea why, but I struggled like the dickens last night to make this come together. :shakes head: Things became somewhat easier for me once I began looking to the lace. Both the image and the lace practically scream "vintage".

And yet, I still struggled. UGH! I HATE it when that happens. But, I prevailed and these are the results. Not too awful, I think. :o)

This card uses:
Stamp Sets: "Greeting Card Kids", "Pocket Silhouettes" (sentiment), "Tiny Tags"
Ink: Early Espresso, Cameo Coral (retired), Blush Blossom, Pretty in Pink, More Mustard, Real Red, Sahara Sand
Papers: Cameo Coral (retired), Early Espresso, watercolor, Newsprint DSP
Accessories: Victoria lace, Early Espresso 5/8" satin ribbon, tiny tags punch, dimensionals, linen thread, sticky strip

Because the bottom of the image was popped up due to the runching of the lace, I needed to use the dimensionals at the top to adhere the image to the card in order for the image to be flat/level.

Overall, I'm fairly pleased with how the card turned out. In fact, I'm anxious to begin watercoloring yet more images. ;o)

--Rach

Thursday, August 12, 2010

In Sorrow

I found out two days ago, one of Brien's friends and former coworkers had suffered a devastating loss--her youngest brother was killed in Afghanistan. I knew I had to make sympathy cards for her and her parents as soon as I got home.

Then, yesterday, more awful news, a coworker lost a life partner. It's a season of sadness right now. :o(


I had been anxiously awaiting the arrival of my "Just Believe" stamp set, and it came while I was away. Looking at it, I knew it would be perfect for the cards I had to create. It's such an elegant stamp set and lends itself to clean and simple cards.

This card uses:
Stamp Sets: "Just Believe", "Teeny Tiny Wishes", "Thoughts and Prayers"
Inks: Marina Mist, Certainly Celery
Papers: Very Vanilla (Whisper White just looked too harsh), Marina Mist, Certainly Celery
Accessories: scallop boarder punch, small pearls, dimensionals


Then, because you know how I am, I had to make the card in another color combination as well. Also, when I make a card, I make TWO of them, that way I can have one on hand if I need it. Or, I will have it on hand as a model for later.


The only difference between this card and the other is I used Rose Red in place of the Marina Mist.

The only thing left to do is include a personal note of condolence and get them mailed.

--Rach

Tuesday, August 10, 2010

Hurry, Autumn

I'm ROASTING!!! It's HOT!! It's not usually this hot in Blacksburg. I was hoping for cooler temps than those in Williamsburg, but it's not happening. :sigh:

Since I'm still in the 'burg, I'm still not in my own studio. I would love to steal some time to play in Lissie's, but with five kiddos five and under running around (or crawling or rolling), it just hasn't been possible. Instead, I took another tour through my archives and located this beauty that has me longing for cooler autumn temps and crisp, colorful leaves.

This card uses:
Stamp Set: "Trendy Trees" I swear, this is such a versatile little set!
Inks: Dusty Durango, Sage Shadow, More Mustard, Chocolate Chip
Paper: Dusty Durango, More Mustard and Whisper White card stock, and some DSP I can't remember--Fall Leaves or some such maybe?
Accessories: Dusty Durango dotted grosgrain, piercing kit, deminsionals

Autumn can't be too far off, right??

--Rach

Monday, August 9, 2010

Home At Last

You haven't lived until you have traveled by car with five children ages five and under. Phew! Are we ever beat, and the poor kids are totally off schedule. They are troupers, though, and have hung in there.

Back home, I decided to post a card I made a week or so back because we have not had one minute to stamp. Here's what I used:

  • Rasberry Tart DSP
  • Rose Red ink
  • Cameo Coral paper and ink
  • Whisper White paper
  • Kiwi Kiss ribbon and ink
  • Pink Flower brad
  • Eastern Blooms stamp set (one of my "go-to" sets)
The layout is simple. I layered paper to add contrast and depth. I love Raspberry Tart DSP and wish I could get my hands on more Kiwi Kiss paper. I've watched Ebay and it's scarce and expensive. I've learned a good lesson by not stocking up on it.

It has been great being with Rachael though we haven't had much time to play with our stamping supplies. We did get to mess around with water coloring a bit. I'm sure Rachael will post a card soon highlighting what she's done.

--Lissie

Sunday, August 8, 2010

Still Traveling


The travels continue, allowing me to continue journeying through my archives. I made this card in July 2009 for my niece, Ella's, fourth birthday. She LOVES and ADORES anything pink, sparkly and princess-y, and I couldn't imagine any child wouldn't love seeing their name all in glitter.

I had seen an idea in the SU! 2008-2009 (I think...) that used Sticky Cuts and glitter on a card, and I felt it would be PERFECT for this card.

This card uses:
*Sticky Cuts
*Chunky glitter and fine glitter
*Melon Mambo and Pink Piourette card stock

The envelope uses:
Stamp Set: "Crazy for Cupcakes"
Inks: Black Staz-On, Melon Mambo, Bermuda Bay

Glitter-ific, Baby! :oP

--Rach

Saturday, August 7, 2010

Lovely as a Tree


Rachael and I are still on the road, so I am posting this card from memory. The problem is I can't remember the name of the DSP. I used a Whisper White card and Summer Sun because of the great contrast with Basic Black. The stamp is from the Lovely as a Tree set and is stamped in Summer Sun. After weaving the strips and gluing them down, I finished off the card with black brads.

--Lissie

Friday, August 6, 2010

From the Archives

Since Lissie and I are traveling for the next few days, I thought I would dig into my archives and post some cards. I made this card in the dead of winter 2009 when the grey days were getting me down. The sunny lemons really perked me right up. :o) "Tart and Tangy" is definitely one of my go-to sets--hm, it hasn't seen ink in a while, maybe I should get it out and play. :o)

This card uses (all SU! unless otherwise noted):
Stamp Sets: "Tart and Tangy", "Happy Everything"
Inks: Yo-Yo Yellow (retired)
Papers: Whisper White, Yo-Yo Yellow, Basic Black
Accessories: black and white ribbon--unknown source, just found it in my ribbon drawer, gromits, two-way glue, Dazzling Diamonds, 1 1/4" circle punch (I think), 1 3/8" circle punch (again, I think--I made this back in 2009 after all)

Hm, I think I would LOVE a nice, cold glass of lemonade right now, seeing as our hotel room is about 100 degrees...UGH!

--Rach

Thursday, August 5, 2010

Water Color Paper


I came up with an idea for a card and decided to stamp the image on water color paper so that I could vary the color. I'm fairly pleased with the end result but have to ask myself, "What were you thinking?". Why did I ask myself this? Because I had INTENDED to glue the layout in a slightly different manner. The two strips of DSP behind the frog should be equidistant from the top and bottom of the card and the ribbon should be right in the middle. In other words, I wanted the layout to be in total symmetry. Oh well. I'll do it better next time.

Here's what I used to make this card:
  • Really Rust paper
  • Mellow Moss paper
  • Very Vanilla paper
  • Juntos DSP
  • Really Rust stamp pad ink
  • Mellow Moss stamp pad ink
  • Creamy Caramel ink
  • Water Color paper
  • Really Rust Taffeta ribbon
  • Mellow Moss Velveteen ribbon
  • Unfrogettable stamp set
  • Aquapainter
I stamped the images in Mellow Moss and then used an aquapainter and ink in the lid of the stamp pads to color in the frog, snail, and flower. I backed the Juntos DSP and the water color paper with Mellow Moss and attached them to the Really Rust card. Because the card is dark, I lined the inside with Very Vanilla. I cut and glued the Mellow Moss ribbon on top of the Really Rust ribbon, attached it to the card, and tied it in a knot.

If you click on the card you can see how water color paper lets you play with color intensity and shading
.

--Lissie

Wednesday, August 4, 2010

Thinking About Autumn

August always makes me think about fall, probably because I taught elementary school for so many years. So I got out Summer Picnic DSP and "Give Thanks", a stamp set I really like. I stuck with two main colors--Real Red and Old Olive both for paper and ink. To add contrast, I turned the Old Olive DSP sideways so that the lines are horizontal. I stamped the image using Basic Black and the sentiment in Old Olive. Using markers, I colored in the apples, leaves and pail. I believe I used Basic Gray for the pail, but I can't remember for sure. If I were to make this card again, I might emboss the pail in gray instead of coloring it in.

Moonlit Inspiration

I'm can't remember where I saw the challenge, but it really called to me. The inspiration photo was black and white with some "pops" of green. I immediately thought of this set, doing a "scene" on a moonlit night in black and white, with cat tails blowing in the breeze. I liked the image so much I left off the green and said to heck with the challenge. ;o)

My challenge was deciding whether to mount the image on black and use a white card, or to mount the image on white and use a black card. Thank goodness for Brien, he comes through time and again when I ask his opinion on color combos and such. :o)

I have to say, I'm beyond pleased with how this card turned out. I don't know who the genius was who first determined you could use the slot punch to make the tops of the cat tails, but I'm beyond happy they did.

This card uses:
Stamp set: "Inspired By Nature"
Paper: Whisper White, Basic Black
Inks: Sahara Sand, Basic Gray, Basic Black
Accessories: Slot punch, 1" circle punch, brayer, sponge daubers, blender pen

Technique:
First I cut the white card stock to 3 1/4"x4 1/2". I then punched a 1" circle from a Post-It note and stuck it to the card stock where I wanted my "moon" to be. Next I inked up the brayer with Sahara Sand and in one even stroke, rolled it on to the image sheet. This left a lighter area in the bottom of the card which I would use as my "water" later.

Then, using the Basic Gray, I went in with my sponge dauber and worked from the corners out and down around the moon. I went over that with Basic Black, confining it to a smaller area, being sure to allow the gray to show through.

I then removed the Post-It, inked up the image and stamped it. I punched some "slots" and adhered them to the card stock. Finally, using a blender pen, I picked up some Sahara Sand that I had "kachunked" into the lid and colored back and forth across the lighter background area at the bottom.

Now, to determined whom I should send the card to...;o)

--Rach

Tuesday, August 3, 2010

Razzleberry Lemonade DSP


First, Rachael needs to teach me how to photograph cards. It's a shame she lives so far away; maybe when she is here on Thursday, she can show me. Rachael and I share many tastes in common--she is my daughter after all--but once in a while one of us will fall in love with a particular Designer Series Paper while the other one could take it or leave it. I think it is this way with Razzleberry Lemonade, one of my favorite papers ever. I think it's because last year's In Colors were my favorites and this paper has many of them in it.

You may have noticed that I often do not stamp a sentiment on the front of my cards. That's because I will decide later, when I plan to actually send the card. That way, if a friend is retiring or a family member has a birthday, the same card could work. So the sentiment for the white space in this card will be added later ... or not.

In addition to the DSP, I used Whisper White paper, and Rich Razzleberry ribbon. (I turned the ribbon over so that the dots would not show.) The stamp is from Baroque Motifs and was stamped using Melon Mambo. I used a Nestie to cut the shape with the stamp and the backing paper and added silver brads in the corners. Finally, I pierced around the white part of the paper.

Monday, August 2, 2010

So Sweet!

So, did I mention I played around with "Darling Dots" quite a bit this weekend?? :oP Once I finished the ladybug card, I saw the cupcakes and thought they could be something very cute. I had been wanting to play with Blushing Bride and thought it would look amazing with Early Espresso (thanks, Liss!). Unfortunately, I keep ordering Basic Black satin ribbon, and NOT Early Espresso, so I dropped back and went with Chocolate Chip instead. Then, when I found this sentiment, I knew it was a perfect compliment to the cupcakes. :o)

In case you can't tell, I really like the clean and simple style. :o) I decided to make these cards simply for fun, and then I found another challenge for which they would be PERFECT. Stampin' Royalty's challenge this week is KISS or Keep it Simple, Sweetie. For me, these fit the bill! :o)

Isn't it funny how piercing the paper made the card just that much more sophisticated? Same card, just pierced.

This one was simply the Stamping 411 sketch--what started me down this road with "Darling Dots" in the first place.

Finally, I couldn't decide if I wanted to do a Chocolate Chip card base or Blushing Bride. So, I did both. ;o)

These cards use (all SU! unless otherwise noted):
Stamp Sets: "Darling Dots", PTI's Signature Greetings, Warm Words
Paper: Whisper White, Chocolate Chip, Blushing Bride
Ink: Chocolate Chip, Blushing Bride, Real Red, Certainly Celery
Accessories: 5/8" Chocolate Chip satin ribbon, piercing kit

Same cupcakes, same layout, four different cards. Pretty nifty! :o)

--Rach

Ladybug Happiness


First, let me say I'm sorry for the photo quality. We've had a number of cloudy days and I just can't get the light right in the studio to get any truly decent photos. Anyhow, in my quest to try a few more challenges, I came across Stamping 411. They had a sketch challenge as well as a color inspiration challenge. I took on the sketch challenge first.

I was trying to decide which stamp set to use when I spied "Darling Dots" lying out on my workspace. I had just finished the purple card and was pretty pleased with the results and decided to give another stamp from the set a go.

I have to say, I had NO idea this little hostess set was so versatile! I'm beyond pleased I got it.

This card uses (all SU! unless otherwise noted):
Stamp Sets: "Darling Dots", "Warm Words"
Paper: Whisper White, Real Red, Basic Black
Ink: Real Red, Basic Black
Accessories: 5/8" black satin ribbon

And, because I can't help but play around with my ideas, I made this card as well--kind of a take on the purple card:

Additional stamp set: PTI's "Signature Greetings"

And, I have to say, those ladybugs do indeed make me smile. :o)

--Rach

Sunday, August 1, 2010

Playing With Paper I Don't Like


Someone generously gave me a pack of DSP that I didn't much care for. Undaunted, I decided to find a way to make a card using it. I reminded myself that Old Olive and So Saffron are colors I love and set out to design a card I could live with. The paper is called Tall Tales; I used the three sheets I liked the most. In addition to Old Olive and So Saffron, the paper includes Really Rust making it a nice trio. I turned to one of my old favorite stamp sets, Eastern Blooms, stamping each flower in one of the three colors of the DSP. I used So Saffron and Old Olive to back the DSP and added buttons in the trio of colors to the card, finishing it off with So Saffron ribbon from the Dress Up ribbon set. I cased the card layout on Split Coast Stampers and altered it a bit to meet my needs. After I finished the card, I realized I could use it either in landscape or portrait mode.